Note: this article is intended for developers. If you are an end user looking for a WordPress image editing plugin, try Scissors and Watermark.
The WordPress 3.5 team has given us a super easy way to edit photos programmatically using the wp_image_editor class. This WordPress image editing tutorial will give usage examples of all image editing methods available in this class:
- Resize images
- Crop images
- Rotate images
- Flip images
- Set image quality (compression levels)
- Generate image filenames
- Create image suffix
- Get image sizes
- Stream images to browser
- Save images
- Save images to multiple sizes (resolutions)
- Check image mime-type support
Using WP_Image_Editor_Supports to Check Server Support
These photo editing functions require server side support via the widely available GD and/or ImageMagick libraries. So just because you or your theme/plugin users have WordPress 3.5.0+ installed, it doesn’t necessarily mean that these methods will be available. That’s where the WP_Image_Editor_Supports function comes in. You might want to stop here and read the WP_Image_Editor_Supports tutorial first.
Calling the Image Editor Function & Image Library Selection
The wp_image_editor class is never called directly. When you are writing your code, you will use the wp_get_image_editor function (note the “get” in the function name, this refers to the “getting” of an available image library for use).
Here is our first line of code:
|
|
$img = wp_get_image_editor( ABSPATH.'wp-content/uploads/temp/user_img.jpg' ); |
This wp_get_image_editor function checks to see if the image libraries are available and selects one to use. Since ImageMagick is superior to GD, the function starts out by running a test to check if the ImageMagick extensions are installed and available in your hosting environment. If that test fails, it will check for GD support. If GD support fails, the function will error out. Failure to find an image library should never happen as you will have already checked for full support using the WP_Image_Editor_Supports function!
The argument used in this function is is the path to the image. The ABSPATH returns the absolute path to your WordPress directory (ie: home/username/public_html/wordpress/).
Using the Methods
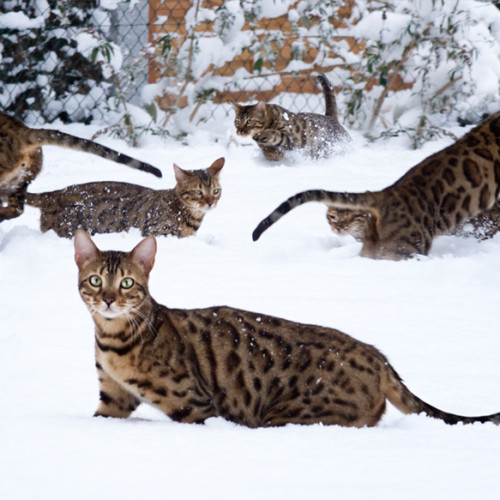
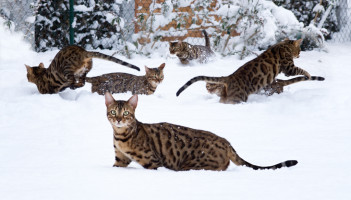
We will try out all the available methods using the 1024 x 583 pixel test picture below. I’ll cover all available arguments and data returned for each method.

Our Test Image
You can download the test image and view license information here.
#1 Streaming Image to Browser
|
|
stream( $mime_type = null ) |
We’ll start out with how to stream an image to the browser. I will include this streaming method for much of the rest of the tutorial. That way we can see what we are doing.
This method actually sets the page header content-type [ie: ( ‘Content-Type: image/jpeg’ ); ], so you can’t just slap it into the middle of html content on your page and expect an image to be streamed out.
We will use a WordPress page template for our testing. Put the following code (and nothing more) into a blank WordPress page template file and preview the page:
|
|
<?php /** * Template Name: Admin Playground */ $img = wp_get_image_editor( ABSPATH.'wp-content/uploads/temp/user_img.jpg' ); if ( ! is_wp_error( $img ) ) { $img->stream(); } ?> |
As long as your image path is correct, your image will be streamed out to the browser like so:
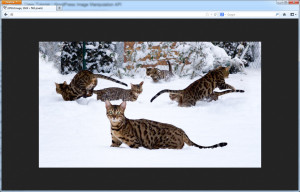
The one argument available with this method is for setting the mime_type that is output. The function will check for mime-type support and keep the existing extension (as long as it’s compatible with the requested mime-type). If the requested mime-type is in a different format than the the image, then the image will be converted on the fly. So if you were to set the mime-type in the stream code above to this:
|
|
$img->stream( $mime_type = 'image/png'); |
Then our jpg image would be converted to, and output as, a png.
What if I have to stream the image into a page of content?
In order to get this stream method to work in a “normal” page with other content, we would need to include the page of code above within another page like so:
|
|
<p>Check out our streaming image:</p> <img src="/wordpress-page-with-streaming-image-code-url/" alt="Streamed!" /> |
Data returned by the stream method:
The image is returned. Nothing else.
#2 Resize an Image
|
|
resize( $max_w, $max_h, $crop = false ) |
The most popular one! Image resizing is what most people are here for. Here it is:
|
|
<?php /** * Template Name: Admin Playground */ $img = wp_get_image_editor( ABSPATH.'wp-content/uploads/temp/user_img.jpg' ); if ( ! is_wp_error( $img ) ) { $img->resize( 500, 500, true ); $img->stream(); } ?> |
This code will resize the image to 500px (width) by 500px (height) with cropping on (true). Our example image is a wide, landscape oriented image, so the height is fewer pixels than the width. Therefore, it will take the height, the smallest of the two dimensions, and reduce it to 500px tall. The width will be scaled down also, so the aspect ratio is maintained. The remaining edges that fall outside our 500px width will be chopped off (cropped). The crop will cut equal amounts of the left and right side, gravitating toward the center of the image.
Examples:
|
|
$img->resize( 500, 500, true ); |
This will create a 500px by 500px cropped image:
|
|
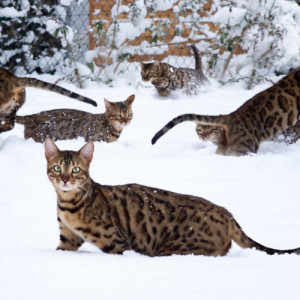
$img->resize( 500, 500, false ); |
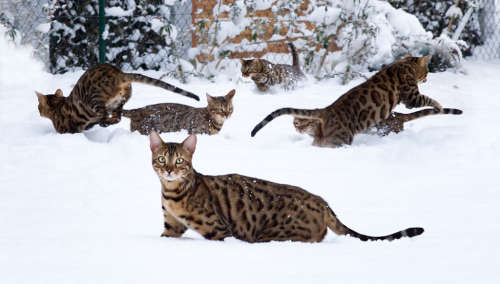
This will take the longest dimension of the image and resize it to 500px. Cropping is turned off. The aspect ratio is maintained. For our example image, this results in a 500px wide image with a height of 284px:

Here is an extended example with streaming turned off and resulting resize dimensions output instead:
1 2 3 4 5 6 7 8 9 10 11 12 13 14 15 16 17 18 19 |
<?php /** * Template Name: Admin Playground */ $img = wp_get_image_editor( ABSPATH.'wp-content/uploads/temp/user_img.jpg' ); if ( ! is_wp_error( $img ) ) { $old_size = $img->get_size(); echo "Old width: ".$old_size['width']."<br>"; echo "Old height: ".$old_size['height']."<br>"; $resize = $img->resize( 500, 500 ); if ($resize !== FALSE) { $new_size = $img->get_size(); echo "New width: ".$new_size['width']."<br>"; echo "New height: ".$new_size['height']."<br>"; } } ?> |
Can I enlarge my images using resize?
No, but stay tuned. If you set the resize dimensions larger than the original image dimensions, no resizing or cropping will be performed. You can use the crop method to enlarge photos and make pixelated wonders.
Can I resize with only a width OR height requirement?
Yes, just make the dimension you don’t want touched NULL:
|
|
//Unlimited width, 500px height, no cropping $img->resize( NULL, 500, false ); |
Data returned by the resize method:
$img->resize will return true if successful. No other information is returned. If you want to verify the size, use the get_size method (as seen is the example above).
#3 Resize an Image to Multiple Dimensions and Save
|
|
multi_resize( $sizes_array ); |
This method is just like the resize method, only it allows you to create many different image sizes at once, generates a filename, and saves them to the current image directory:
1 2 3 4 5 6 7 8 9 10 11 12 13 14 15 16 17 18 19 20 21 22 23 24 25 26 27 28 29 30 31 |
<?php /** * Template Name: Admin Playground */ $img = wp_get_image_editor( ABSPATH.'wp-content/uploads/temp/user_img.jpg' ); if ( ! is_wp_error( $img ) ) { $sizes_array = array( // #1 - resizes to 100x100 pixel, square-cropped image array ('width' => 100, 'height' => 100, 'crop' => true), // #2 - resizes to 200 pixel max width/height, non-cropped image array ('width' => 200, 'height' => 100, 'crop' => false), // #3 - resizes to 200 pixel max height, non-cropped image array ('width' => 9999, 'height' => 200, 'crop' => false), // #3 - resizes to 450 pixel max width, non-cropped image array ('width' => 450, 'height' => 9999, 'crop' => false) ); $resize = $img->multi_resize( $sizes_array ); foreach ($resize as $row) { echo "<p>"; echo $row['file']."<br>"; echo $row['width']."<br>"; echo $row['height']."<br>"; echo $row['mime-type']."<br>"; echo "</p>"; } } ?> |
The foreach section loops through the returned array and will give you the filename, width, height, and mime-type of each image.
The code above created these images:
#1 (user_img-100×100.jpg)

#2 (user_img-175×100.jpg)

#3 (user_img-351×200.jpg)
#4 (user_img-450×256.jpg)

This method will overwrite any images in the current image directory that have the same output file name.
The save path and file name cannot be altered using this multi_resize method. If you need to control that, use the individual resize method multiple times.
Data returned by the multi_resize method:
A multidimensional array that includes the filename, width, height, and mime-type of each image is returned. An example of looping through these results is shown in the method example above.
#4 Set the Image Quality (compression)
ImageMagick’s compression works on a variety of image formats, but you will see the best results with the lossy jpeg format. The compression level can be set anywhere between 1 and 100. The default is 90.
|
|
<?php /** * Template Name: Admin Playground */ $img = wp_get_image_editor( ABSPATH.'wp-content/uploads/temp/user_img.jpg' ); if ( ! is_wp_error( $img ) ) { $img->resize( 500, NULL, false ); $img->set_quality( 100 ); $img->stream(); } ?> |
We’ve resized our image to 500px wide, no cropping, and set the quality at 100 percent. The image produced is 191kb:

Now lets set the quality to 80. The image produced is 59kb:

At a quality of 60, our image becomes 48kb:
At a quality of 40, our image becomes 42kb:

At a quality of 20, it becomes 37kb:
As you can see, keeping the quality around 80 or above is probably a good idea.
Data returned by set_quality:
This method will return TRUE if successful. Nothing else is returned.
#5 Crop an Image ($img->crop)
|
|
$img->crop( $src_x, $src_y, $src_w, $src_h, $dst_w, $dst_h, $src_abs ); |
There are a number of parameters on this method (src=source, dst=destination):
- $src_x (required) – determines the starting X position (left to right) to crop from.
- $src_y (required) – determines the starting Y position (top to bottom) to crop from.
- $src_w (required) – the width to crop
- $src_h (required) – the height to crop
- $dst_w (optional – default is null) – resizes to this width after cropping
- $dst_h (optional – default is null) – resizes to this height after cropping
- $src_abs (optional – default is false) – Does something interesting… see below.
Confused yet? This will example will clear it up. The red box is what we want to keep:
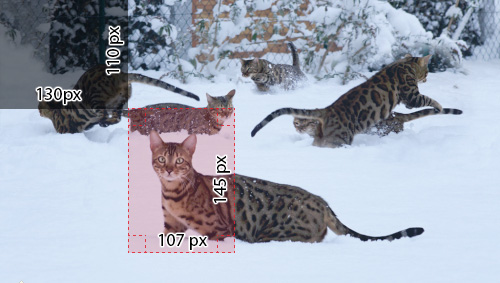
Shaded Box: src_x = 130px, src_y = 110px
Red Box: src_w = 107px, src_h = 145px
So we want to start our source X crop (src_x) 130px from the left and our source Y crop (src_y) 110px from the top. From this X/Y coordinate point that has been established (the bottom right of the shaded box), we want to create an image 107px wide (src_w) and 145px high (src_h).
Here is the code required to execute this crop:
|
|
<?php /** * Template Name: Admin Playground */ $img = wp_get_image_editor( ABSPATH.'wp-content/uploads/temp/user_img.jpg' ); if ( ! is_wp_error( $img ) ) { $img->resize( 500, NULL, false ); $img->crop( 130, 110, 107, 145, NULL, NULL, false ); $img->stream(); } ?> |
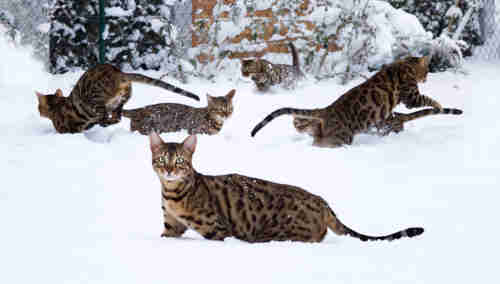
Here is the result:

So now that we’ve covered 1-4 of the arguments, let cover 5 and 6.
dst_w and dst_h resizes the cropped image. If we wanted to double the size of our resulting crop (which at this time is 107x145px), we would make dst_w = 214 and our dst_h = 290:
|
|
$img->crop( 130, 110, 107, 145, 214, 290, false ); |
That doubles the size of our image:

The last parameter (src_abs), if true, alters the src_w and src_h using this formula::
$src_w = $src_w – $src_x;
$src_h = $src_h – $src_y;
So it subtracts src_x and src_y amounts from the final image. I don’t know why you would want to use this, it makes no sense to me. The comments in the code say “If the source crop points are absolute“. Please leave a comment if you have found a scenario where this is useful.
Data returned by by crop:
Crop will return false on failure. Nothing else is returned.
#6 Rotate an Image
This method allows you to rotate an image counter-clockwise by degrees. Here is a 270 degree counter-clockwise rotation (same as a 90 degree clockwise rotation):
|
|
<?php /** * Template Name: Admin Playground */ $img = wp_get_image_editor( ABSPATH.'wp-content/uploads/temp/user_img.jpg' ); if ( ! is_wp_error( $img ) ) { $img->resize( 300, NULL, false ); $img->rotate( 270 ); $img->stream(); } ?> |
If you make a non-square rotation (ie: anything other than 90, 180, 270), the image will be angled and black background will fill in the image. Here is a 60 degree rotation:
Data returned by rotate method:
Rotate will return false if it fails. Nothing else is returned.
#7 Flip an Image
This method allows you to flip an image on the vertical axis and on the horizontal axis. So if you change $horz to true, the image will be flipped on the horizontal axis, resulting in a vertical flip:
|
|
<?php /** * Template Name: Admin Playground */ $img = wp_get_image_editor( ABSPATH.'wp-content/uploads/temp/user_img.jpg' ); if ( ! is_wp_error( $img ) ) { $img->resize( 300, NULL, false ); $img->flip( true, false ); $img->stream(); } ?> |
That code will give us this vertically flipped image:
To flip the image horizontally (vertical axis), we change the second argument to true:
|
|
$img->flip( false, true ); |
Which gives us this:
You can set both arguments to true to flip both axes:
|
|
$img->flip( true, true ); |
Data returned by the flip method:
The flip method returns true if successful. Nothing else is returned.
#8 Generating an image filename
|
|
generate_filename( $suffix = null, $dest_path = null, $extension = null ) |
This method generated an image file name suffix, path, and extension:
|
|
<?php /** * Template Name: Admin Playground */ $img = wp_get_image_editor( ABSPATH.'wp-content/uploads/temp/user_img.jpg' ); if ( ! is_wp_error( $img ) ) { $img->resize( 300, NULL, false ); $filename = $img->generate_filename( 'final', ABSPATH.'wp-content/uploads/final/', NULL ); $img->save($filename); } ?> |
We have used the generate_filename method to set the filname and path used in the “save” method’s argument. The code above will rename our “user_img.jpg” to “user_img-final.jpg” and save it into “/final/” directory in our uploads folder.
If we wanted to convert the image to a png, we can set the their argument to “png” in the code above:
|
|
$filename = $img->generate_filename( 'final', ABSPATH.'wp-content/uploads/final/', 'png' ); |
Data returned from the generate_filename method:
The full image path is returned as a string.
#9 Get an Image Filename Suffix
Whenever an image is resized (using any of the various methods) the filename suffix is updated with the new dimensions appended. As you have seen by now, whenever we resize the test image to a width of 300 pixels, the automatically generated filename looks like this: user_img-300×170.jpg. If we wanted to get this new suffix programmatically, we use get_suffix.
|
|
<?php /** * Template Name: Admin Playground */ $img = wp_get_image_editor( ABSPATH.'wp-content/uploads/temp/user_img.jpg' ); if ( ! is_wp_error( $img ) ) { $img->resize( 300, NULL, false ); $suffix = $img->get_suffix(); echo "Our new filename suffix is: ".$suffix; } ?> |
Refresh the page and you will see “Our new filename suffix is: 300×170”
Data returned by the resize method:
The filename suffix is returned as a string.
#10 Get an Image Width and Height
Want to know what the width and height of the image currently is? This method will tell you:
|
|
<?php /** * Template Name: Admin Playground */ $img = wp_get_image_editor( ABSPATH.'wp-content/uploads/temp/user_img.jpg' ); if ( ! is_wp_error( $img ) ) { $size = $img->get_size(); echo "<p>Image is currently ".$size['width']." by ".$size['height']."</p>"; echo "<p>Resizing...</p>"; $img->resize( 500, NULL, false ); $size = $img->get_size(); echo "After resize, image is ".$size['width']." by ".$size['height']; } ?> |
The code above will output this:
Image is currently 1024 by 583
Resizing…
After resize, image is 500 by 284
Data returned by the get_size() method:
The image [width] and [height] is returned in an array.
#11 Save Image
|
|
save( $destfilename = null, $mime_type = null ) |
This method will save your current image with the destination, filename, and mime-type of your choosing. The first argument is for the destination directory and filename. If left NULL, the current image directory will be used and a filename will be generated automatically. The second argument is for mime-type. You can convert the image or leave it NULL to keep the current mime-type. In this example we will resize the image then save it with default settings:
1 2 3 4 5 6 7 8 9 10 11 12 13 14 15 16 17 18 19 |
<?php /** * Template Name: Admin Playground */ $img = wp_get_image_editor( ABSPATH.'wp-content/uploads/temp/user_img.jpg' ); if ( ! is_wp_error( $img ) ) { $img->resize( 100, 100, true ); $saved = $img->save(); //all information returned by $saved echo "Full path: ".$saved['path']."<br>"; echo "Filename: ".$saved['file']."<br>"; echo "Width: ".$saved['width']."<br>"; echo "Height: ".$saved['height']."<br>"; echo "Mime-type: ".$saved['mime-type']."<br>"; } ?> |
If we wanted to set the save method arguments for destination and change the mime-type to png, we would do something like this:
|
|
$saved = $img->save(ABSPATH.'wp-content/uploads/final/user_img.png','image/png'); |
Note that when selecting a destination directory, the directory must already exist. This method will not create a new directory for you.
Data returned by the save method:
An array with the image full path, filename, width, height, and mime-type are returned.
#12 Mime Type Support Check (supports_mime_type)
|
|
supports_mime_type( $mime_type ) |
There is a dedicated support function available for checking mime-type and other photo editing method support. I would think you would want to get the mime-type using get_mime_type, then check it using the support function. But, if you want to do it this way instead of using wp_image_editor_supports, here is what you would do:
|
|
<?php $img = wp_get_image_editor( ABSPATH.'wp-content/uploads/temp/user_img.jpg' ); if ( ! is_wp_error( $img ) ) { if ( $img->supports_mime_type !== FALSE ) { echo "Mime-Type Supported! Continue doing something..."; } } ?> |
ImageMagick supports every image mime-type you will ever need. GD supports ‘image/jpeg’, ‘image/png’, and ‘image/gif’. If the editor is able to read the image format, but not output it, then ‘image/jpeg’ will be used as the default fallback output format.
Data returned by the supports_mime_type method:
If the mime-type is not supported, $img->supports_mime_type will return false.
Why even check the mime-type? Why not just check the extension?
You can rename interesting.exe to interesting.png. That doesn’t convert the executable to an image, it just messes up the extension. The mime-type check is a more reliable way to check the file type. That said, it’s not foolproof and can be faked.
Also, I’ve had a well-meaning client add “.jpg” to the end of their (non jpeg) photo file names when renaming images and emailing them to me (simply because he thought all images were supposed to end with .jpg). Mime-type checks will help in those situations.
How do I check for errors after each method is called?
Using wp_error.
Also, Mike Schroder, one of the developers, has some great information on the wp_image_editor class, including filters that can be used.
That’s it! Do you have a question about this WordPress image editing tutorial? Let me know in the comments.